A document that considers accessibility issues will reach a wider audience than one that doesn’t. Here’s how to do that in Microsoft Word.
Image: BigTunaOnline/Shutterstock
You don’t always know your audience so when you’re creating a document for the web or a number of unknown recipients, so you should keep accessibility in mind. In fact, make it a priority if you want the best results. Accessibility isn’t new but it’s not on the average Word user’s mind—not yet. But Microsoft 365 has gone a long way to help make documents more accessible to a wider audience by including text-to-speech technology. In this article, I’ll review three TTS readers and then share a few general guidelines for making Word documents more accessible.
SEE: 83 Excel tips every user should master (TechRepublic)
I’m using Microsoft 365 on a Windows 10 64-bit system. There’s no demonstration file; you won’t need one. SST is available in Microsoft 365 desktop apps and Word for the web. This document does not review accessibility laws.
About TTS readers in Word
Text-to-speech readers are common nowadays, and Windows 10 and Microsoft 365 come with built-in TTS features. In this section, we’ll review three: Read Aloud, Narrator and Speak.
Word’s newest reading feature is Read Aloud; it’s available in Office 2019 and Microsoft 365. You’ll find it on the Review tab in the Speech group. It’s easy to use and does exactly what you might expect—it reads your document aloud. Click the option and it will start reading at the insertion point. Click it again to stop. Click it again to begin again—where you stopped (if you haven’t moved the insertion point).
When you start the feature, Word displays a set of controls in the top-right corner of the document screen (Figure A). The buttons are self-explanatory for the most part: Previous, Play and Next. The Settings button lets you choose a reader and the speed.
Figure A
” data-credit>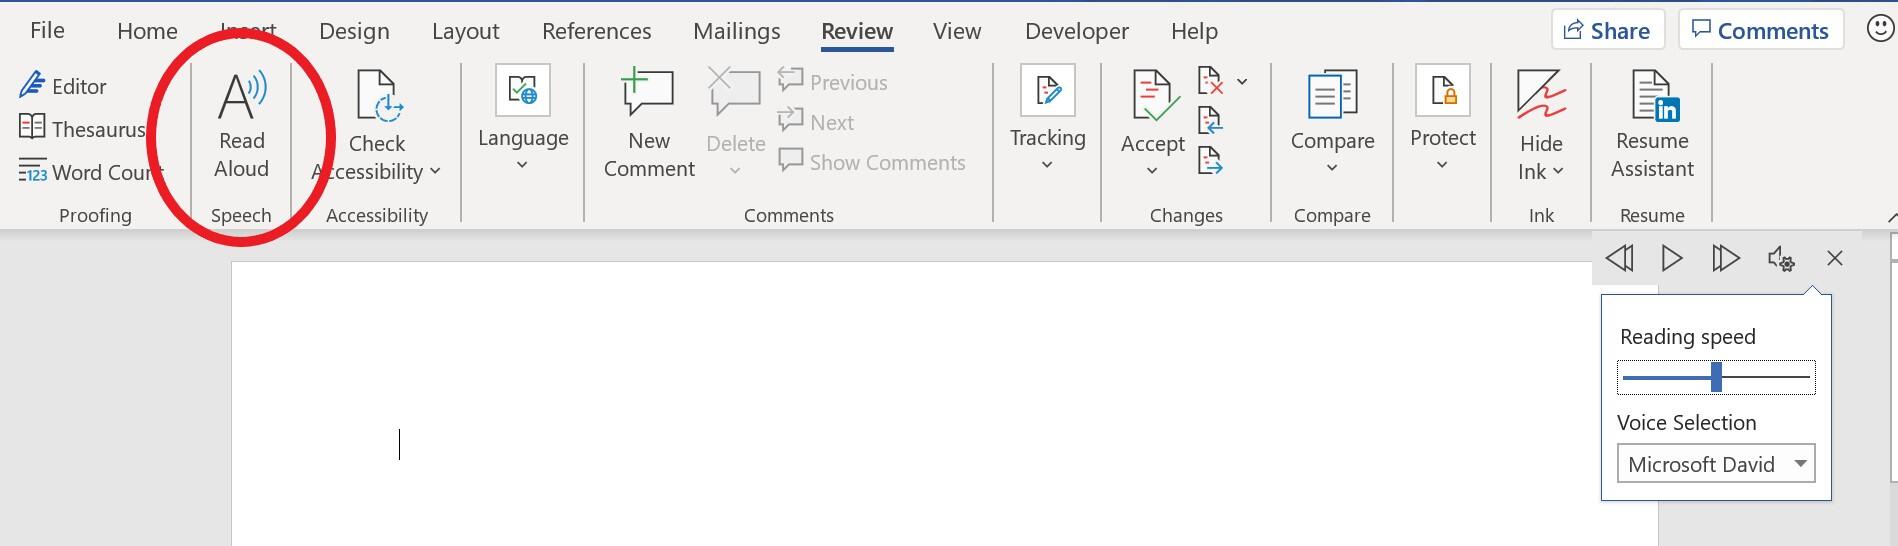
Read Aloud’s default settings.
Although this feature is limited, reading only text, it offers a few keyboard shortcuts that extend its functionality a bit. See Table A for an explanation of these shortcuts. It’s easy to use, but limited because it won’t read anything but text. If you must acknowledge graphics, use Narrator.
Table A
|
Shortcut |
Explanation |
|
Ctrl + Alt + Space |
Start Read Aloud |
|
Ctrl + Space |
Play or pause Read Aloud |
|
Ctrl + Left Arrow |
Skip to the beginning of the previous paragraph |
|
Ctrl + Right Arrow |
Skip to the beginning of the next paragraph |
|
Alt + Left Arrow |
Decrease the reading speed |
|
Alt + Right Arrow |
Increase the reading speed |
Narrator is a Windows 10 screen reading app that reads everything in the document, including user interface options. This reader is also available in Windows 8 and supports Office 2013 and later versions.
There’s a lot to learn if you want to use Narrator, but for our purposes, you need only two shortcuts:
- Start and stop Narrator: Press Windows key + Ctrl + Enter
- Open and close settings: Press Windows key + Ctrl + N
If you’ve not used Narrator before, opening it will display the Narrator Home page where you can read online tutorials and review settings. It begins by reading the Home page. To disable this page, uncheck the Turn on Show Narrator Home When Narrator Starts option in the bottom-left corner. Otherwise, every time you start the feature, you’ll start by viewing this page—it becomes annoying fast.
SEE: Windows 10: Lists of vocal commands for speech recognition and dictation (free PDF) (TechRepublic)
Once on, Narrator tells you a lot about a document: the document’s name and path, ribbon options and even the task bar buttons. To read through the document, click anywhere inside it. While reading the actual document, Narrator lets you know when it encounters non-text elements, such as pictures, graphics, videos, links and so on. If the graphic doesn’t have alternate text, Narrator will read the file name.
There’s really no way to prepare you to use Narrator. Turn off the Home page as suggested above and jump right in—using it is the quickest way to learn its features. My personal experience is that it’s clunky and annoying until you become familiar with it. If you don’t like it, you can try a number of third-party TTS apps.
Speak is an older feature that reads selected text. I mention it to be comprehensive. In the newest versions, you must add it to the Quick Access Toolbar (QAT) to access it.
Now, let’s look at a few ways to make your TTS reader more efficient when reading Word documents.
1. Use alternate text
An electronic reader reads text. Narrator lets you know that it has encountered a graphic. But it won’t describe pictures and other graphic elements. That’s why you enter alternative text. In Word, right-click the graphic element, choose Edit Alt Text from the resulting submenu. Doing so opens the Alt Text pane shown in Figure B. As you can see, it tries to describe the graphic, but for now, you will probably enter a more meaningful description. Remember, graphics are often as informative as the text, and you’ll want to add that information as alternative text.
Figure B
” data-credit>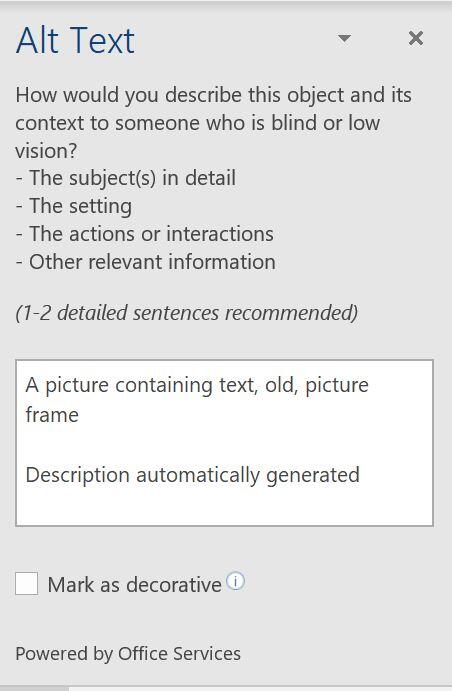
Enter a description for graphic files and pictures.
2. Use meaningful link text
A reader will read a URL, but it won’t be particularly helpful. Instead, display meaningful and unambiguous link text. For instance, instead of http://anysite.com, or “see more” or something similar, use “Click now to access our company’s home page.”
Leave the hyperlink style—blue font and underline—in place. Users who are visually impaired need clues to help them discern hyperlinks. In addition, avoid linking graphics and images. If you do, be sure to put that information in the graphic’s alternative text.
3. Apply high-contrasting features
Fonts, colors and contrast are a big topic when accessibility is important—far too big to tackle in this one article. What’s important to remember is this:
- Fonts should be larger than normal.
- Use a font with clear simple characters.
- Make sure there’s a great deal of contrast between text and the background.
- Color-blind individuals don’t process red and green correctly. When using those colors include other ways to discern meaning other than color.
I’ve oversimplified the subject, but you get the idea.
4. Add closed captions in videos
A video isn’t of much value to someone with impaired hearing or sight. If you must include a video be sure to add closed captions. Word won’t help you do this, so you’ll need a third-party capturing service. This is another big topic and comes with a bit of a learning curve. If the video comes with embedded captions, make sure you view them all to ensure they’re accurate.
5. Run the Accessibility Checker
When you think your document is done, Word can check it for accessibility properties. Word will scan your document and suggest changes to make the document more accessible. You can apply the advice or not. Click the Review tab and then click Check Accessibility in the Accessibility group. Word will display the Accessibility pane. As you can see in Figure C, Word found a graphic without alternate text.
Figure C
” data-credit>
Run the Accessibility Checker.
6. Listen yourself
This last bit of advice can be used on any document, even if you’re not concerned with accessibility. Using Read Aloud will help you find awkward phrasing and other text that you might not read as subpar but sounds subpar. Listening to a reader evaluate your intentions is the best way to learn when your efforts just don’t work as expected.
Making a document more accessible takes little time or specialized knowledge. Going forward, try to keep this in mind unless you know your audience and know accessibility isn’t an issue.

Microsoft Weekly Newsletter
Be your company’s Microsoft insider by reading these Windows and Office tips, tricks, and cheat sheets. Delivered Mondays and Wednesdays