
Windows 10 Power Automate taps into the benefits of low-code programming. Individual users have the power to automate just about everything in a Microsoft environment.

Image: Olivier Le Moal/Shutterstock
While still trying to get traction in many parts of the business world, there is little doubt that the concepts of artificial intelligence, automation and low code programming are becoming essential to business enterprises looking for a competitive edge. Employees who can automate the mundane daily tasks of their jobs would be free to perform work that is much more productive and impactful—a win-win situation.
Microsoft has recognized this trend and is offering a free version of its Power Automate system to any Windows 10 user. Power Automate taps into the benefits of low-code programming to allow individuals to automate just about everything in a Windows 10, Microsoft 365 and Azure environment. This how-to tutorial shows you how to use Power Automate tools to create a simple application.
SEE: Windows 10: Lists of vocal commands for speech recognition and dictation (free PDF) (TechRepublic)
How to create your first app with Windows 10 Power Automate
As explained in a previous TechRepublic article, the free version of Windows 10 Power Automate can be downloaded and installed on any PC running a current version of the operating system. We are assuming you have followed procedure and now have Power Automate installed.
To begin creating your first Power Automate app, double-click the icon on your desktop. You should see a screen like Figure A, where there is not much going on yet.
Figure A

Click on the + New Flow button on the screen to start the building process, as shown in Figure B. The first step is easy enough: Give your new app a name and click the Create button.
Figure B

Now, we get to low-code app construction screen (Figure C) where we provide your app with its instructions either by dragging and dropping actions from the long list in the left-hand window or by recording actions using either the web or desktop recorder.
Figure C

If you take the time to peruse through the various actions, you will notice there are hundreds of potential actions available. Perhaps you need to access data from your company’s data warehouse every day, a Power Automate app could potentially reduce that task to a single mouse click.
We will keep it simple for our example and pretend we have to check weather conditions for a particular ZIP code every day. Scroll down the left-hand window’s list of actions to find Web automation. First, let’s start a Microsoft Edge session.
Drag and drop the Launch new Microsoft Edge action to the center window and drop it. This will start a new form screen (Figure D) asking for details about our proposed action.
Figure D
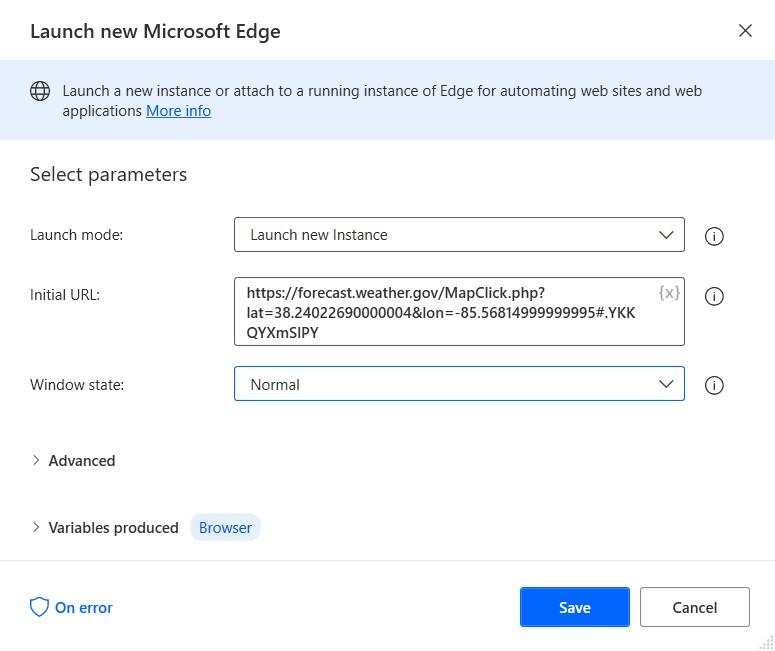
We add a URL for our app to open. We could further specify which window size we wanted to use, whether to start a new session and even what should be done if an error is returned. Once you are happy with your parameters, click the Save button.
Now, let us say we want to extract just certain elements about the weather from the web page we used in our first action. We will choose Web data extraction from the action list and select Extract data from web page. Drag that action to the center window to bring up an input screen.
Click on our subject web page (NOAA) to bring it to the forefront. Power Automate will reveal an extraction tool to make the data selection process easier, as shown in Figure E. We merely highlight the data we want to extract, right-click it and choose Extract as text, and then click the Finish button and then Save.
Figure E

Depending on our needs, we can extract this data in a simple table, or we can extract in a format ready for an Excel spreadsheet. As you can see in Figure F, I am extracting some basic weather information (temperature, humidity, dew point and date). Perhaps part of my job is to keep track of that data daily.
Figure F

Once we have collected the data, we don’t need that web page to be open anymore, so we can add an action that closes it again. Figure G shows our simple three-step Power Automate app in its completed form. We have performed a test run, and it has performed without any errors.
Figure G

To save our app, click the File tab in the navigation ribbon and select Save. Close out the Power Automate app creation screen to reveal our new app on the Windows 10 Power Automate desktop screen, as shown in Figure H.
Figure H

From this dashboard we can run, edit or even delete our app as needed. Of course, we could create other conditions and add actions to our app as well. Perhaps we want to run this new app on startup each day, perhaps we need a reading at 9 a.m. and at 3 p.m. All those conditional situations are possible with a little tweaking in the Windows 10 Power Automate app creation tool.

Microsoft Weekly Newsletter
Be your company’s Microsoft insider by reading these Windows and Office tips, tricks, and cheat sheets. Delivered Mondays and Wednesdays