Adobe recently brought out a new feature called Super Resolution, which can increase the resolution of your images by up to four times. I tested this feature out on some heavily cropped images I’d recently edited. The results were fantastic.
When I took the plunge last year and bought the Canon EOS R5, a big part of my reasoning was that the larger sensor (45MP), compared with the Canon 5D Mark IV, would provide much more flexibility in my editing and cropping options. Particularly in my line of work, where I often shoot surfing with telephoto lenses from a fair distance, the ability to crop in close without almost completely losing the ability to print is very important. I’ve been extremely happy with the performance and the cropping options the Canon EOS R5 has provided me thus far, but I was certainly more than a little interested when Adobe recently brought out its new Super Resolution feature. According to Adobe’s Eric Chan. the term “Super Resolution” refers to “the process of improving the quality of a photo by boosting its apparent resolution.” In short, Chan says Super Resolution “can intelligently enlarge photos while maintaining clean edges and preserving important details.”
How to Access Adobe’s Super Resolution: Bridge or Photoshop?
When I opened Photoshop CC recently and ensured it was up to date, I had no issues accessing the Super Resolution feature through the ACR plug-in. Thus, I want to walk you through the process of using the new Super Resolution feature and then look at the impact it has.
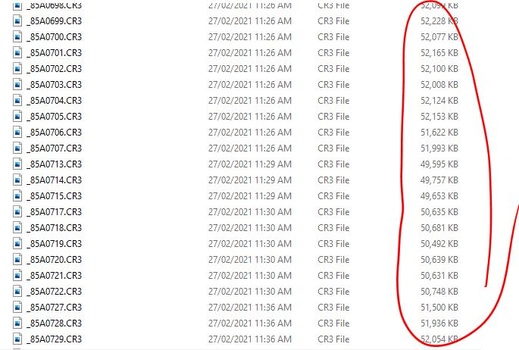
First, you need to decide on which raw images you want to work. From the image below, you can see a bunch of raw images I took on the Canon EOS R5, which are all around 45-50 MB in size.
After I’d decided on the image I was going to work on, I opened Photoshop and then File > Open to access my raw image. Once I’d done that, Adobe Camera Raw opened the image automatically. You can see at the bottom that the raw image was 8192 x 5464 pixels and 45 MP.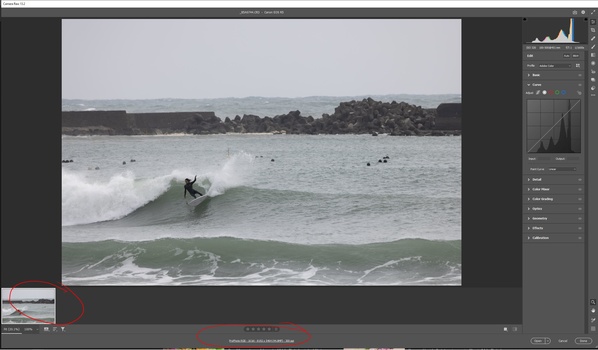
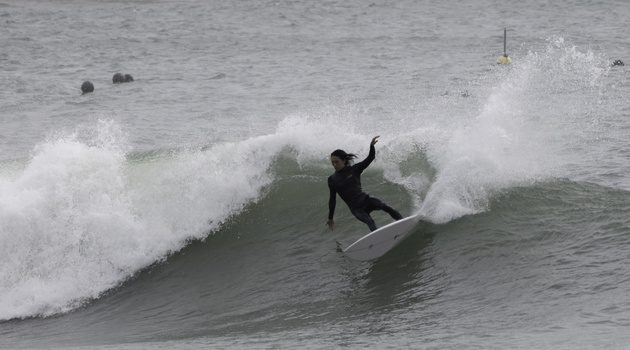
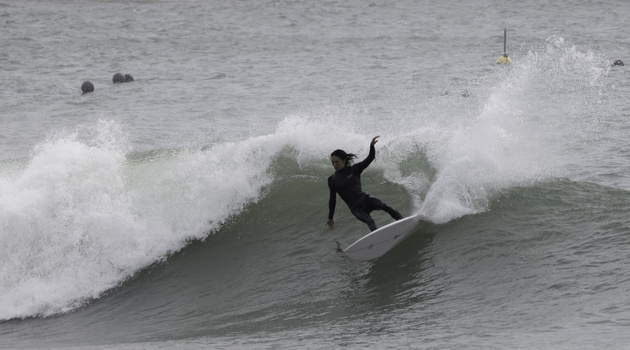
After that, I cropped the image to a much smaller size for the purposes of this test, as you can see below. Compared with the original image, there’s barely anything left.
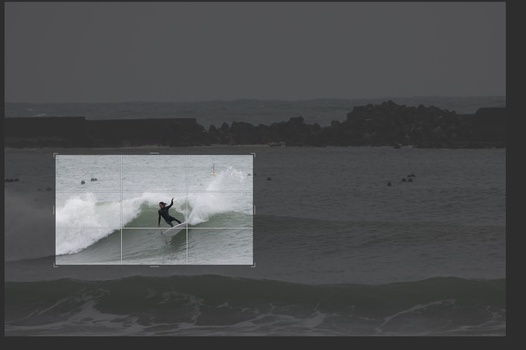
In the past, using cameras with much smaller sensors, this would have been almost impossible to get away with if I’d wanted to do anything more than post to social media, but with the Canon EOS R5, even such a heavy crop still gave me 5.8 MP to work with. As a rule, I don’t like printing files less than 10 MP (my own personal preference), so I was very intrigued by what Adobe’s Super Resolution could come up with.
How to Use Adobe Super Resolution
Once I’d cropped the image and I was happy with the new composition (and the 5.8 MP file size), I put the new Super Resolution feature through its paces. All you have to do is right-click on your image (still in ACR), and you’ll see the dialog box appear. Towards the bottom, you’ll see Enhance written on the menu. Simply click that.
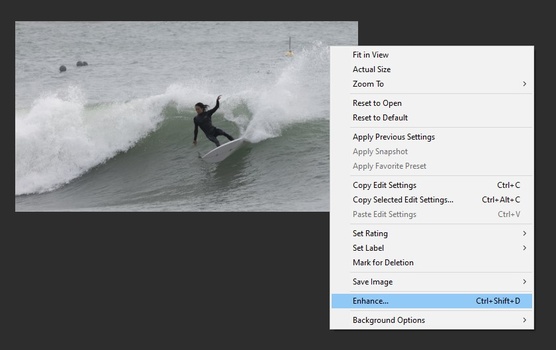
Once you’ve clicked that, the next dialog box will appear automatically, and you’ll see Super Resolution written. It will be pre-checked for you.
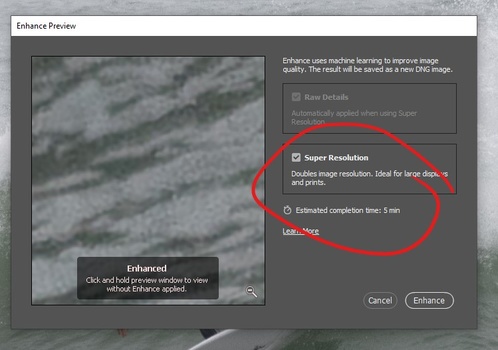
When you click the Enhance button at the bottom right of the dialog box, ACR will turn the cogs and calculate an estimated completion time. As you can see above, my estimated completion time was five minutes, which seemed rather long to me for a 5.8 MP file, but I’m happy to report it took nowhere near that long. It was definitely no more than a minute at most.

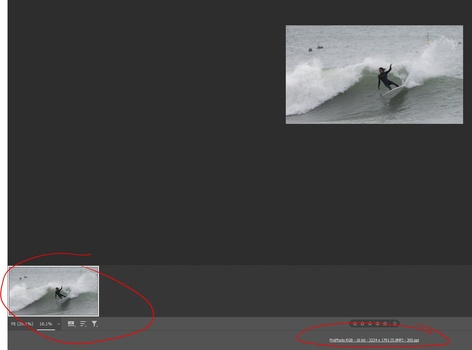
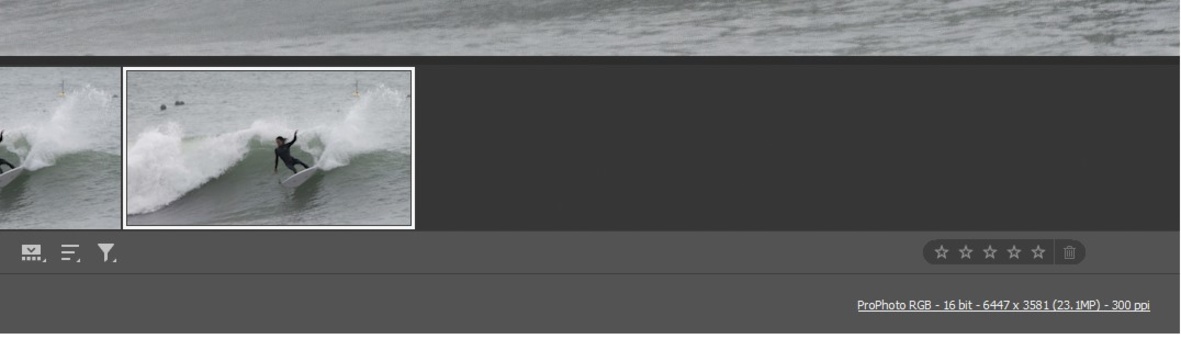
After the process had finished, a new image appeared next to my original, as you can see above. The original 5.8 MP is on the left, and the new image that had been through the Super Resolution process is on the right. So, how big was my new image? As you can see in the image below, it came out at 23.1MP, which is pretty much four times as big as the original. However, it’s important to note that it was still an unprocessed image in Adobe Camera Raw and I hadn’t saved it to JPEG format.
After Using Super Resolution, How Big Is the Final Image?
For the purposes of this test, I did no editing at all. I simply opened the image in Photoshop and automatically clicked File > Save As. Once the Dialog Box opened, I selected Maximum for Quality Options, then clicked Save.
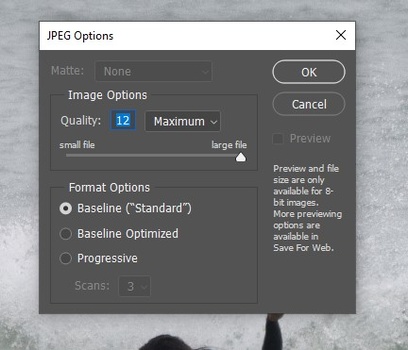
Photoshop did the rest and gave me a final imaged saved in JPEG format. How big was the final image once it had been processed? As you can see below, it came out at a very respectable 9.3MB.
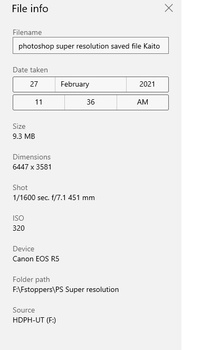
However, what’s far more important is that to my (and critical) eye, there was nothing weird or out of order in the new image. Whatever machine learning Adobe’s Super Resolution uses, it worked a treat to increase my file to size to something I’d be comfortable printing on paper or canvas while retaining all of the quality of the original image. Check for yourself below. The first image is saved without using the Super Resolution feature, and is 3.13MB. The second is the 9.3MB version saved using Adobe’s Super Resolution feature. It’s very hard to find any discernable differences, which made me double check that it was actually two separate images. After numerous checks, the two images are indeed different (3MM/9MB) which is, perhaps, a glowing endorsement of just how effective the super resolution feature is and how well it works.
As an aside, I have seen a few people on the internet actually run two or three iterations on the same image, with pretty good results. By about the fourth time, some weird things started happening, but I’d imagine (without having tried it yet) that using it twice wouldn’t be too big a problem if your original image is crisp and high quality.
Is Adobe’s Super Resolution Any Good?
For me, the answer to that question is a resounding yes. As I touched on earlier, one big reason for me buying the Canon EOS R5 was the extra flexibility the bigger sensor gave me. Even though I’m ecstatic with my purchase and have absolutely zero buyer regret, if Adobe’s Super Resolution feature had existed at that time, I might not have been so keen to jump to a bigger sensor.
What are your thoughts? Have you used Adobe’s Super Resolution? And what have been your experiences? I’d love to hear from you in the comments below.