Every year, I run dozens of workshops for photographers, and there are always the same areas that even established photographers have not grasped. Learning the metering and exposure ropes opens a gamut of creative possibilities.
Metering
Almost without exception, modern interchangeable lens cameras have through-the-lens (TTL) metering. This is a simplified explanation, but using the basic default setting, TTL measures the amount of light coming through the lens. The metering tells the camera what the exposure settings should be.
Entire Frame Metering
From most users’ points of view, the default metering is an average of the entire frame. It is more complex than that, though. Cameras’ processors are programmed to make assumptions about photographs. Consequently, they may change the meter reading depending upon where different amounts of light are distributed within the photo. But thinking of it as an average taken across the whole frame is a simple and usable way of working with metering.
This metering mode has a variety of different names depending upon the brand of the camera, and, unhelpfully, the icons change from system to system too. On your camera, it may be named evaluative, matrix, multi, ESP, multi-zone, multi-segment, or multi-field. Whatever it’s called, this mode is particularly well suited for scenes where there is an even distribution of light throughout the frame, such as a typical landscape.
Spot and Center-Weighted Metering
There are two other common metering modes. Center-weighted metering emphasizes an area in the middle of the frame. This is great for portraits.
Meanwhile, spot metering, as its name suggests, concentrates on an individual spot in the picture. Basic cameras restrict this to the center of fame. However, far more useful is when that spot is tied to the focusing point. A typical use for this might be photographing flying birds against a bright background. As the focus point tracks around the framed bird, the metering spot moves with it.
Different brands have other metering modes for specific purposes, and there are too many to describe them here. If you are unsure, please feel free to ask about them in the comments; I’ll try my best to answer.
Exposure
A lot of photographers confuse metering with exposure. Although linked, they are two separate functions. While metering measures the light, exposure settings change the shutter, aperture, and ISO according to that metered light to create an image of a particular overall brightness.
Your Camera Can Be Fooled Into Suggesting the Wrong Exposure
In an automated or semi-automated (aperture or shutter priority) mode, the camera will adjust the exposure of the frame to cohere with the metered light. It will try to produce a Goldilocks image, neither too bright nor too dark but, on average, mid-toned.
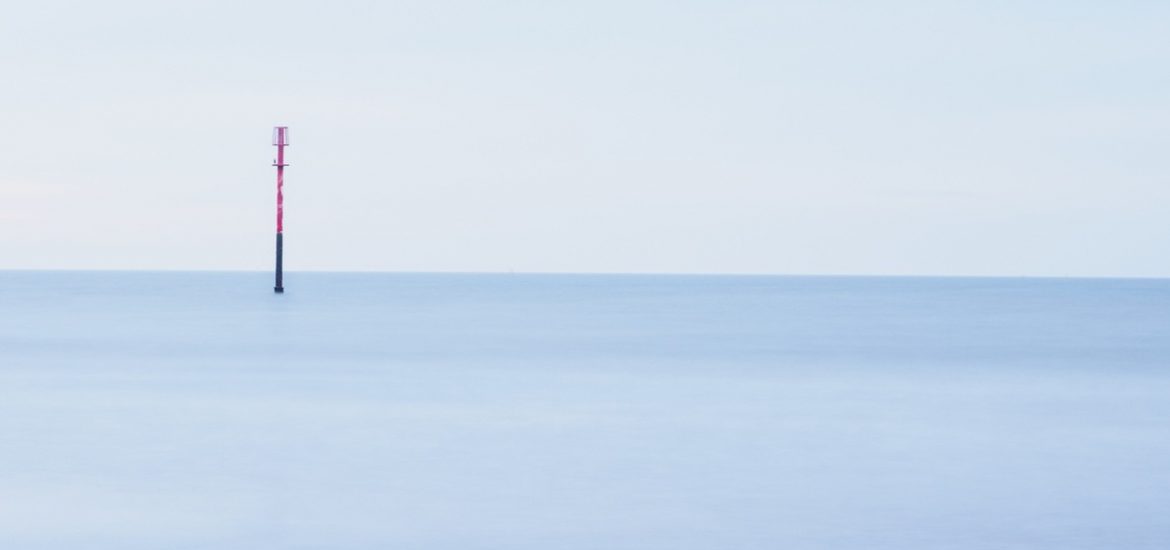
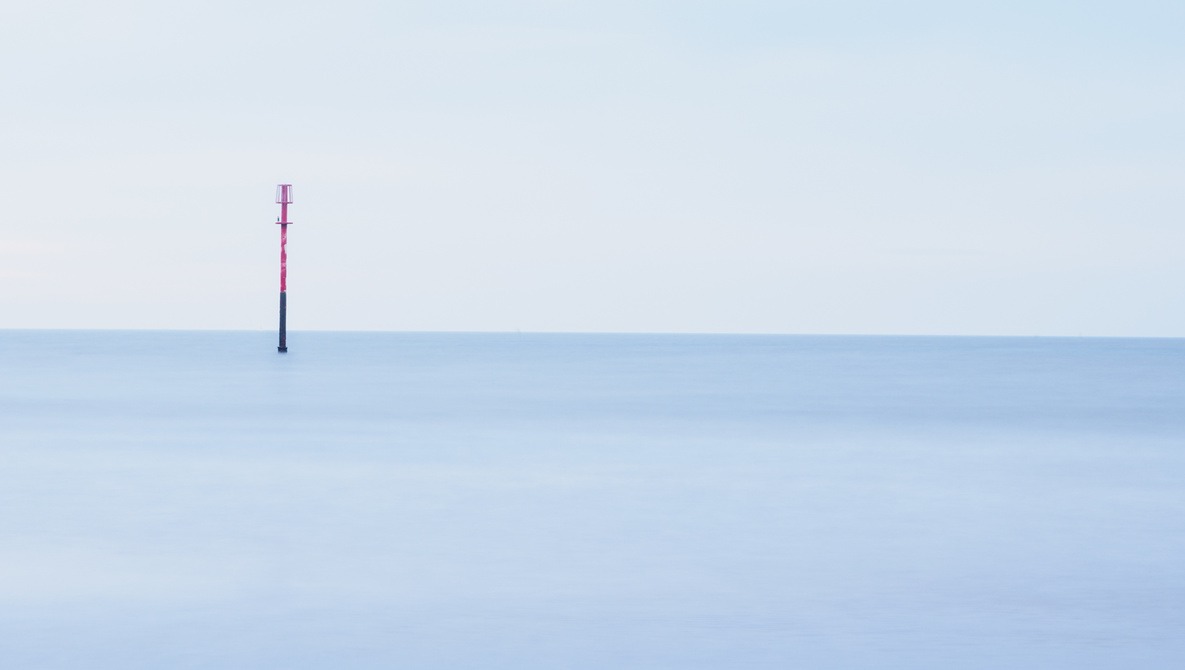
This is fine, but what if the scene we are shooting is exceptionally bright, like photographing contre-jour? I am often pointing my camera across the ocean towards a sunrise. Consequently, the camera will expose that dominant bright light to be mid-toned. Therefore, the water becomes a dull mid-tone in the picture.
Similarly, if we are photographing a primarily dark frame, the camera will try to brighten the image up, making blacks turn mid-gray. This might not be the result you are looking for.
Give it a go. Take a photo of a sheet of white paper, filling the frame with it (you may need to draw something in the middle of the paper for your camera to focus on) and look at the resulting image. The paper will appear gray, not white. Now, fill the frame with something black, like the back of your camera bag. Again, the resulting photo will be dominated by grays and not black.
If shooting in aperture or shutter priority, this is where exposure compensation becomes essential. It’s counterintuitive, but dialing in positive exposure compensation for a bright scene and negative exposure for a dark one will give you a result where the photograph more accurately reflects what your eyes saw.
I estimate that in 80% or more of my photos, the exposure I chose is not the one that the camera’s metering recommended. This is partly because of the dominance of either bright or dark areas in my photos, but also because it is one of the most useful creative techniques available to us.
The Histogram and Exposure
The screens on the back of the cameras and in the viewfinders on mirrorless and bridge cameras are not calibrated. They are often adjusted to be brighter so you can see them in daylight. The histogram gives you a more accurate way of judging exposure than looking at the screen.
It may seem confusing at first. A histogram is like a bar chart, but with no gaps between the bars. Each bar does not represent a single value, but a range of values. If you want to learn more, I wrote a fuller explanation of the histogram back in July.
The histogram on a camera is a simple representation of the number of pixels at different luminosities (brightnesses) within the image. The left-hand side is black. Next to that, moving to the right, come the shadows, and then the midtones are in the middle of the chart. To the right of the midtones are the highlights, and finally, the whites.
A big peak in one section of the histogram will mean there is a large area with that luminosity in the image. If there are no pixels in another area of the histogram, that means that none of the pictures has that luminosity.
If most of the histogram is pushed to the left, the photograph will be mainly dark; a low-key image. Conversely, high-key images will have most of the pixels illuminated as highlights or whites, so the histogram will be pushed to the right.
Images with a U, M, and W-shaped histogram will have strong contrast with clearly defined areas of separate tones. Meanwhile, having all the pixels pushed together will represent a low-contrast image.
It’s a misconception that an underexposed image will have all the histograms on the left-hand side. Taking the sunrise seascape I mentioned before, without exposure compensation, the pixels for the brightest areas would be in the midtones (middle) area of the histogram, when they should be on the right-hand side.
Using Exposure Creatively
Once you know how exposure and metering works, you can apply them creatively.
Imagine walking through a forest and a shaft of light beams through the trees and falls on a single leaf. Because most of the frame is dark and only the leaf is bright, in auto settings, the camera will bring the dark area up into the mid-tones, and parts of the bright leaf will become blown-out whites.
By applying for negative exposure compensation, the brightness of that leaf can be brought down to the middle of the histogram and the dark background pushed to the left so it becomes black.
You now have a picture of a leaf against a dark background.
It’s possible to do the reverse of this too, making a high-key image by pushing the highlights into the whites and the blacks and shadows into the midtones.
Buying a New Camera? Here’s What to Look For
Because exposure control is one of the most important tools in photography, it is something that you want quick and easy access to. A lot of cameras have just one dial and therefore require pressing a [+/-] button before entering exposure compensation. It is much faster to have two dials instead. In manual mode, one is set to adjust the aperture and the other, the shutter speed. In aperture or shutter priority, the second dial adjusts exposure compensation.
If you use a semi-automated mode, such as aperture priority, then also look at the amount of exposure compensation that is possible. Three stops on either side of zero compensation are barely adequate, but I recommend looking for a camera that has at least plus and minus five stops of available compensation.
Let’s Hear Your Thoughts and Experiences
There is a lot more to this than I can include in this short article. If you have any thoughts about this topic that other readers might find helpful, or if you have a question, please leave a comment. It would be great to see your images where you have used exposure creatively too.