Lightroom may not be quite as complicated or as deep as Adobe Photoshop, but there is a lot of nuance in the software. In this video, find out some key tips on how you can use one of the best features of the program: the Gradient Filter.
When it comes to editing images in Lightroom, I usually gravitate towards the sliders, some color tweaking, and very little else. I mainly use Lightroom to process raw files and not to make larger edits, which I typically do in Photoshop. However, on the rare occasion I shoot landscapes, I find I take more time in Lightroom to make adjustments, and the Gradient Filter is one of my go-to tools.
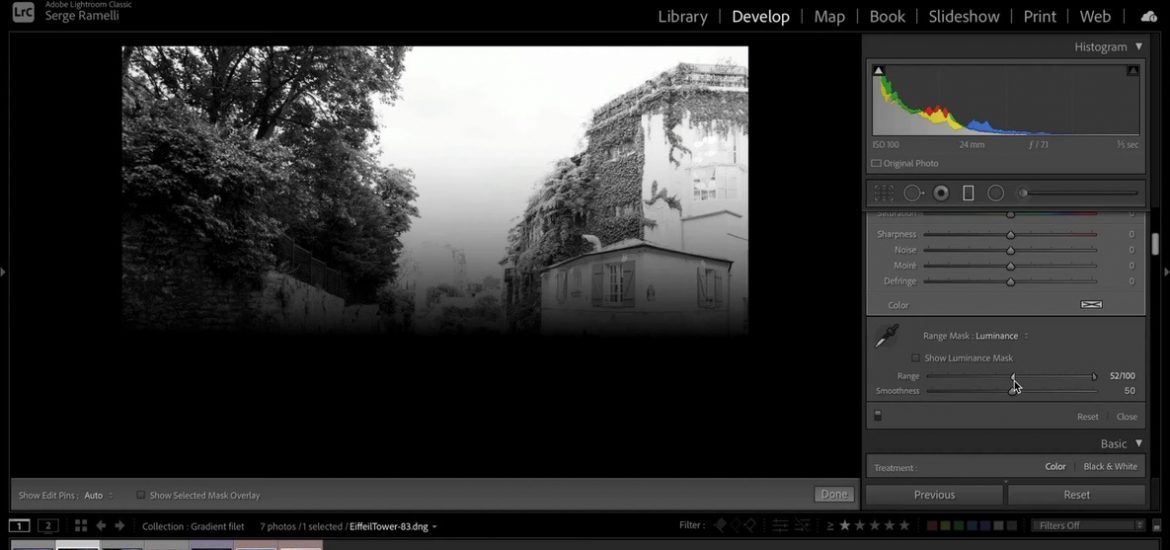
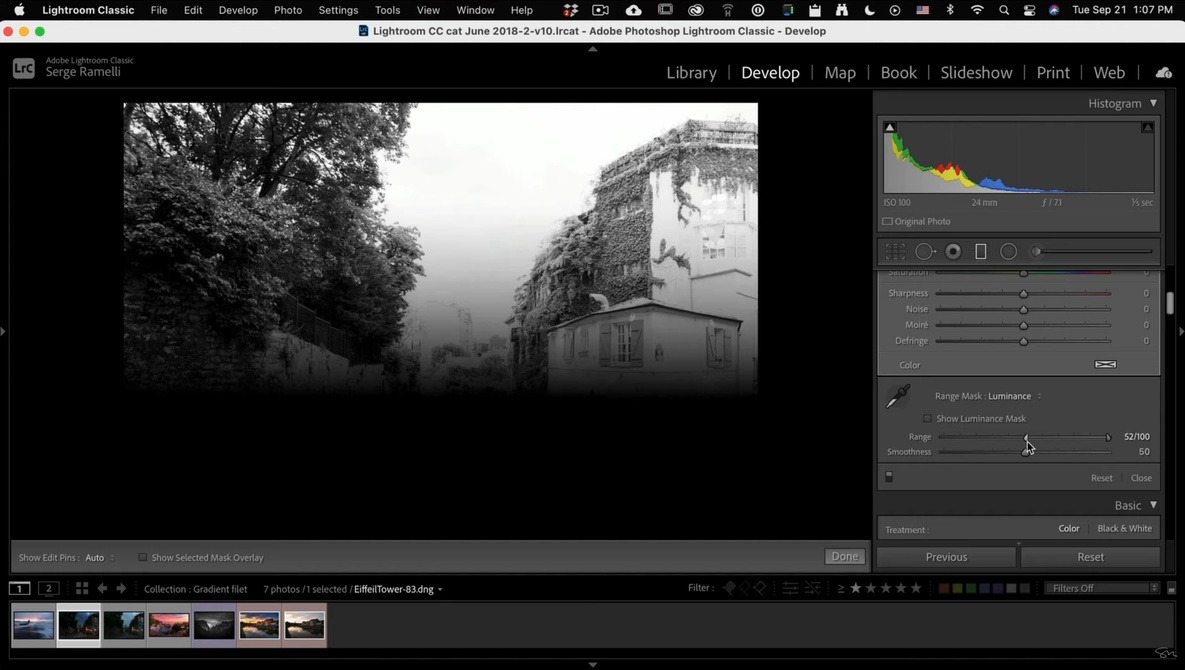
While it can be highly effective at adjusting skies, I find that it is too often heavy-handed in what it does to the overall image. The gradient from the top to the bottom is reasonably easy to get to a pleasing state, but the sticking point is how much of the image it affects. When I first started photography, I remember I would darken all the features of the landscape image that ventured above the highest point of the land and into the sky, like trees. This gives off a horrible, unrealistic effect and can quickly ruin an otherwise good image.
In point 3 of this video, Serge Ramelli discusses the solution I ended up finding for this problem: the Luminance Mask. There are a number of other useful tips to take in, so sit back, and improve your Lightroom post-production.